Epoxy for Beacon Installation: BEEKs CM v2
Overview
The BEEKs CM v2 beacon has a high-bandwidth MEMS accelerometer that is used for vibration-based condition monitoring. In order to preserve the mechanical frequency response of the accelerometer and maximize its performance, the beacon must be mounted with a suitable epoxy. A suitable epoxy has the following characteristics:
- Strong bond to preserve the mechanical frequency response of the accelerometer
- Strong bond to withstand the environment in which the beacon is deployed
- Easy to apply and work with: gel epoxies are typically easier to work with than liquid glues. While some liquid glues may provide sufficient holding strength, they are typically difficult to work with when installing the beacon on a curved and uneven (painted, rather than smooth metal) surface or hard-to-reach areas.
Recommended Epoxies
The following is a list of recommended epoxies. All of these epoxies are gel (relatively easy to work with) and have been verified to preserve the mechanical frequency response of the beacon. The conditions for use and suitable environments are specified for each.
- Devcon 5-minute is a good choice for a fast installation, and is secure for most normal environments where the beacon is indoors and will not experience heavy wash down or possible impacts.
- Loctite AA 330 is stronger than the Devcon 5-minute, but will take longer to set. This may be a good choice for assets that are located in areas where the beacon could potentially experience occasional impact. This epoxy requires an activator (Loctite 7387/ 7388).
- Devcon Plastic Welder is the best choice for harsh or outdoor environments. It has a much longer set time than the Devcon 5-minute and Loctite A330, so it is typically not used unless absolutely necessary.
Epoxy Application
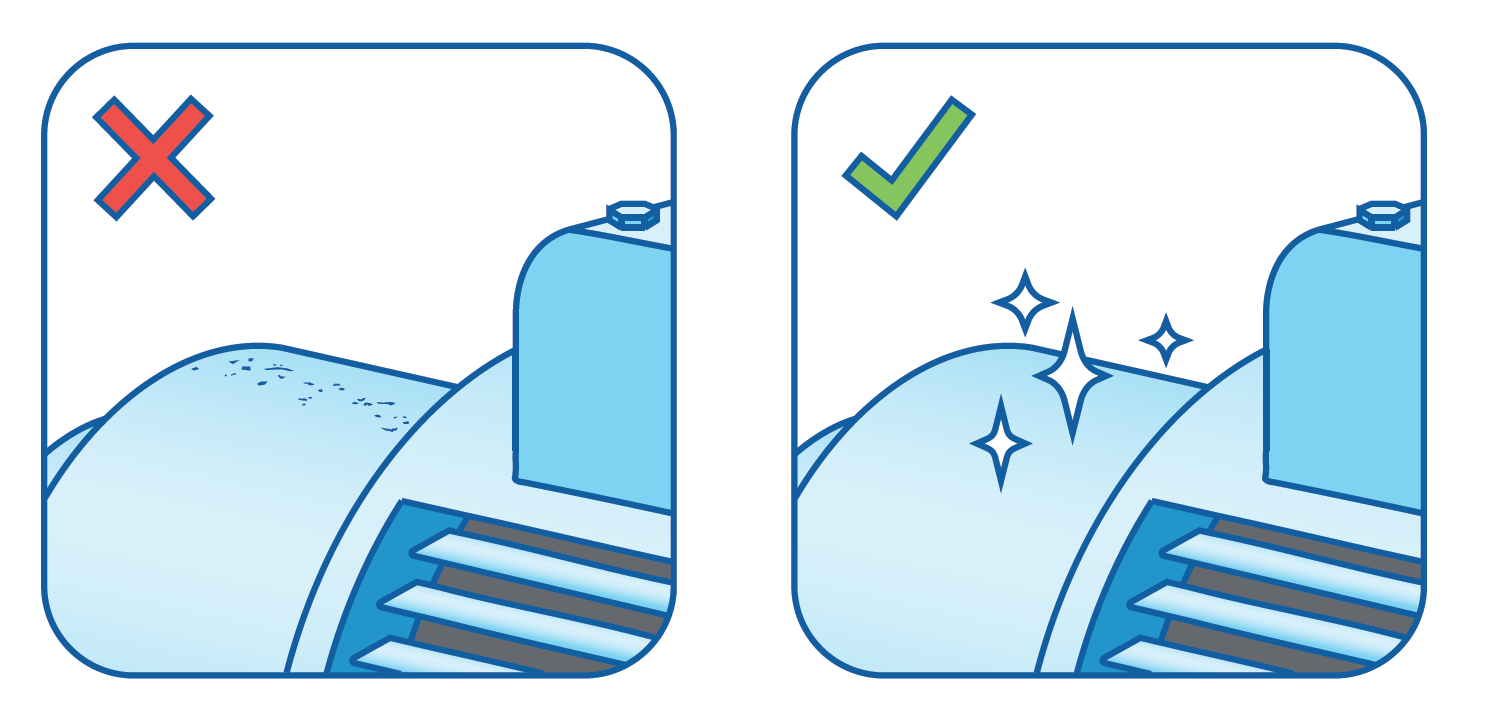
Before installing the beacon, it is important that the mounting surface is properly prepared. The surface should be free of any dirt, dust, oil, rust, or loose paint.
For guidelines on ideal mounting locations, please see the mounting recommendations tutorial.
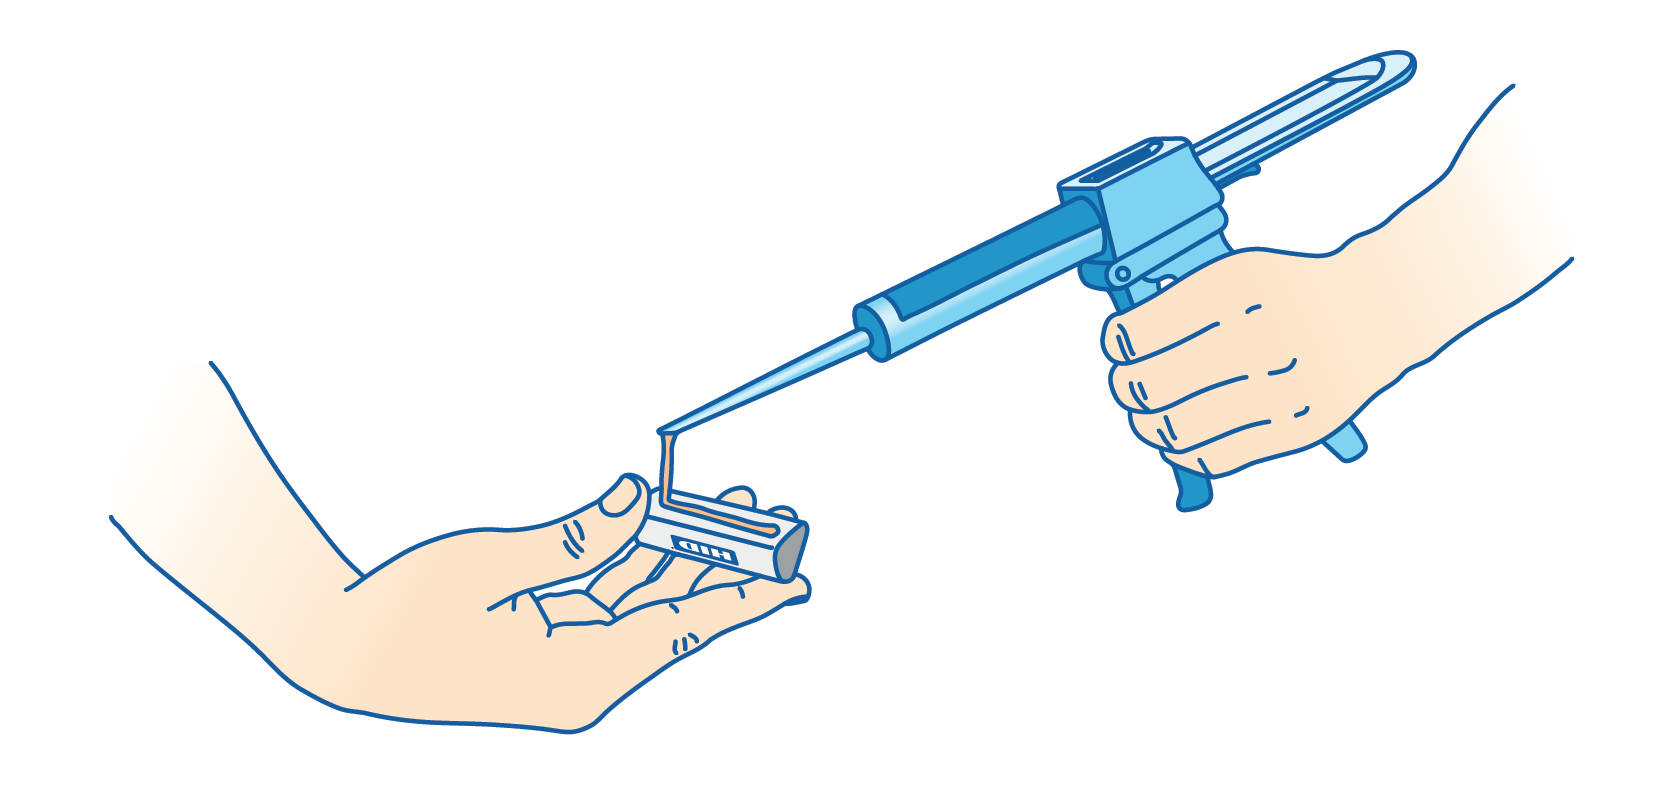
The recommended epoxies are available in many different container sizes. If available, the 50 ml dual-cartridge is a good choice as it has enough epoxy for the installation of many beacons (25+, typical), is easy to work with, and can be re-used. The 50 ml container requires a reusable epoxy gun and disposable mixer tips.
A single mixer tip can be used for a full container of epoxy, however, if the beacons are being installed in multiple sessions (hours or days apart), several mixer tips will be needed. When you are finished with a session, simply leave the mixer tip installed on the cartridge, remove the cartridge from the gun, and place the cartridge upright on a flat surface. The epoxy will set in the mixer tip, which will function as a cap to the cartridge. When you are ready to use again, remove the old mixer tip and replace with a new one.
When applying the epoxy, it is usually best to first place a line of epoxy to the bottom of the beacon, then press the beacon firmly to the mounting surface of the asset to be monitored. When mounting vertically or to the underside of an asset, it may be necessary to temporarily secure the beacon with tape, a zip tie, or clamp while the epoxy sets.
Beacon Removal
If a beacon needs to be removed from the surface on which it has been epoxied, it may be possible to do so in some applications. If the Devcon 5-minute epoxy was used, the beacon can usually be removed by placing a flathead screwdriver at the base of the beacon and tapping it with a hammer (take care not to strike the beacon with excessive force). If the Devcon Plastic Welder was used, it may be difficult or impossible to remove the beacon with reasonable force.