This guide will help you how to create virtual BluFI setup in Bluzone and provision BluFl to your project .
...
Once the BluFI are provision to your project then use "Virtual Device" tab in Bluzone console to create virtual devices.
1. General Setup
The following method you can use to create virtual BluFI in Bluzone.
Creating Virtual Device One-by-One
Creating Virtual Devices via Bulk Upload
Creating Virtual Devices One-by-One
Step 1 : Open the URL : https://bluzone.io/console/#/login and login to your Bluzone project .
...
Step 5 :Select BluFI from the list and drag the Virtual Device to the desired location on the map.
...
Creating Virtual Devices via Bulk Upload
Step 1 : Open the URL : https://bluzone.io/console/#/login and login to your Bluzone project .
...
Step 5 : Click Virtual Devices tab and select virtual device .
...
Step 2 6 : Click Virtual Devices tab.Select virtual deviceand drag the Virtual Device to the desired location on the map.Press Save
Repeat the above step2 until all BluFI have the location.
...
3. Provision Virtual BluFI with Installer App
Download the following HID IoT Installer App from the Apple Store:
https://apps.apple.com/gb/app/hid-iot-installer/id1524806871
...
NOTE :
You may be required to trust the app on your iOS device. If prompted for this issue, follow the instruction as in the below link
https://support.apple.com/en-au/HT204460
Step 1 : Launch the Bluzone app on your device and make sure that mobile / IOS device is connected to internet.
...
Step 2 : Enter your username and password, then choose Log in with Bluzone.Your login must have access to the project(s) which you are installing
...
Step 3 :You will see a list of projects to which you have access. select the project that you are installing from the list.
...
Step 4 :Choose the floor on which the BluFIs will be installed.
...
Step 5 : Choose the location that you are installing from the list, then tap on Install button.
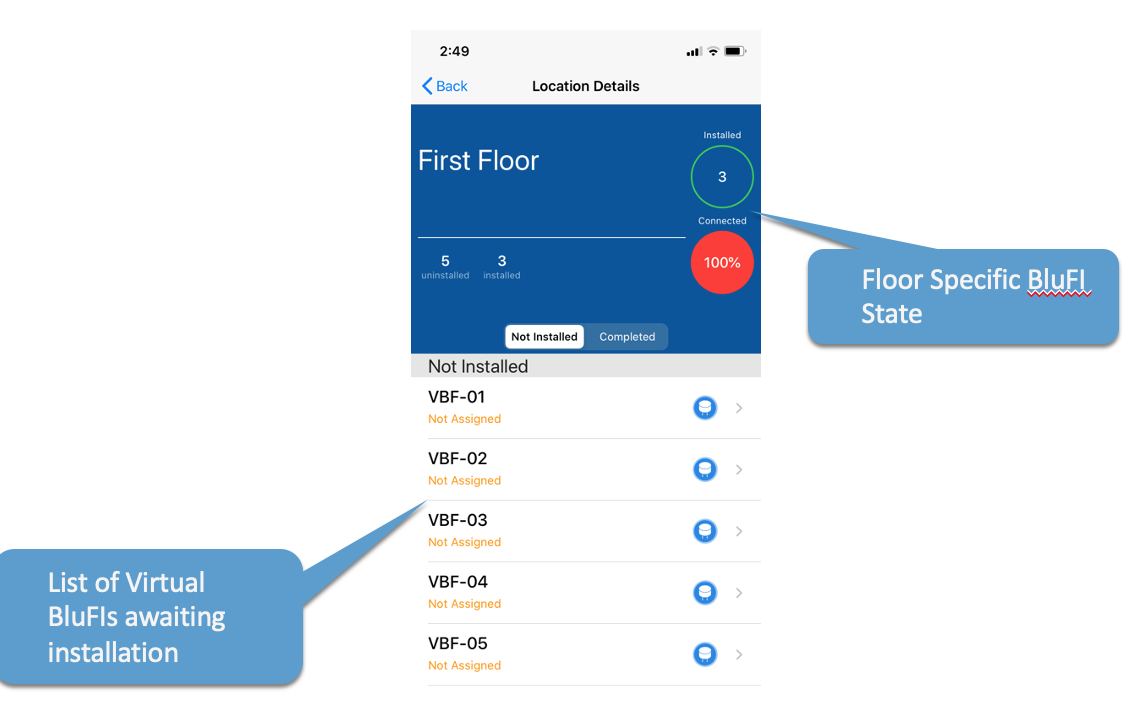
Step 6 : Retrieve a pre-provisioned BluFi from stock and scan the QR code. Choose Assign when prompt, await confirmation of successful process completion. If Blufi you have chosen not yet been provisioned, you will be prompted to provision it before the process continues. Repeat the process for all BluFI’s awaiting installtion.
Step 7 : Wait for “Connected” status to appear on the screen as shown below .
...
3.1 Replacing an Existing Virtual BluFI
Step1 : Choose the BluFi that you are replacing from the list, then choose Replace.
...
Step 2 : Retrieve a new BluFi from stock and scan the QR code. Choose Replace when prompted, await confirmation of successful process completion. If the Blufi you have chosen has not yet been provisioned, you will be prompted to provision it before the process continues. Repeat the process for all BluFi’s awaiting replacement.
...
Step 3 : Wait for “Connected” status to appear on the screen as shown below .
...
4. Provision Virtual BluFI with Bluzone Mobile App
Download the Bluzone mobile app from IOS App Store or Google Play .
...
Step 10 : BluFI associated to the project.
4. BluFI Functionality & Geofence Policy Testing
4.1 Geofence Policy Testing
Step 1 : From the floor-level screen, change the Not Installed filter to Completed.
...
Step 2 : Choose the BluFi that you are testing from the list, then choose Test.
...
Step 3 : Choose Geofence Policy Test first from the Test Type dropdown, then choose the Geofence policy that you will be testing by choosing Policy Assigned, then searching for the room.
...
Step 4 : Next, specify the beacon to be used for testing by first choosing Test Beacon, then by scanning the QR code on the test beacon. Follow the onscreen instructions to complete the test. Repeat testing steps for each room to be tested.
...
4.1 Geofence Policy Testing
Step 1 :From the floor-level screen, change the Not Installed filter to Completed.
...
Step 2 : Choose the BluFi that you are testing from the list, then choose Test.
...
Step 3 : Choose Blufi Functionality Test first from the Test Type dropdown, then choose the beacon that you will be using for testing by choosing Test Beacon. Adjust the default Min Detectable RSSI value, if appropriate. Follow the onscreen instructions to complete the test. Repeat testing steps for each Blufi to be tested.
...
5. Beacon Provisioning
Step 1 : From the project screen, choose the + sign in the top right corner of the screen, then choose Provision a Beacon.
...
Step 2 : Select the beacon ID from the list of detected beacons.
...
Step 3 : Select template
...
Step 4 : Select Location
...
Step 5 : Press Provision
...
Step 6 : Wait for message “Device provisioned Successfully “ .
6. Deployment and Network Troubleshooting
If you are experiencing a issue with provisioning or BluFI connectivity with Bluzone cloud then refer the below section.
Network Troubleshooting: Network requirement details for BluFI and for troubleshooting BluFI connectivity to Bluzone cloud.
5. Additional Product Information
Product Specifications sheet
...